How To Edit/Add JSP Pages in NetBeans IDE
15 April 2007
NetBeans IDE is very useful for J2EE application development. It provides support for developing EJB, WebServices, JSP, Servlets along with the J2EE components. Here is an introduction of developing JSP pages using NetBeans IDE.
NetBeans has full feature support for generating HTML elements, JSP tags, database JSP tags automatically.
Some basic information of JSP tags are listed below to brush up your knowledge in JSP.
-
Tag ” taglib ” is used to include JSTL library in JSP page. Listed below is an usage.
<%@taglib uri=”http://java.sun.com/jsp/jstl/core” prefix=”c”%> -
Tag “c:” tag is used to check some conditions. Listed below is an usage.
<c:if test=”isNew” var=”car” scope=”request”>
</c:if> - Tag ” sql” is used for database related operations.
There are various tags in JSTL Library. Netbeans help us to include those to the our JSP pages without much programming effort..
Follow these steps to get familiar with JSP development in NetBeans
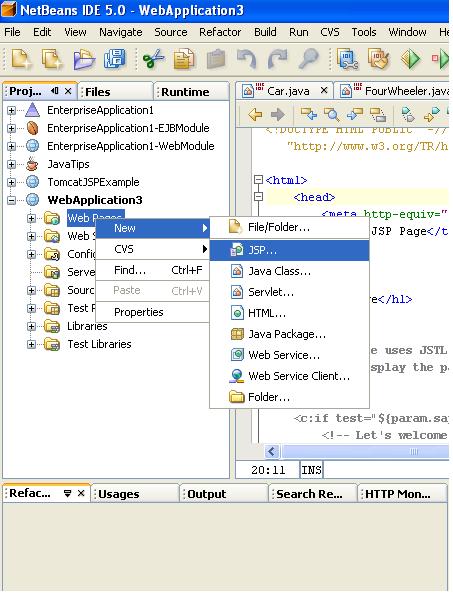
- Create a “Web Project” in the “Projects” tab in the IDE.
- Then “ Web Pages ” - > “ JSP …” - > “ New ”.
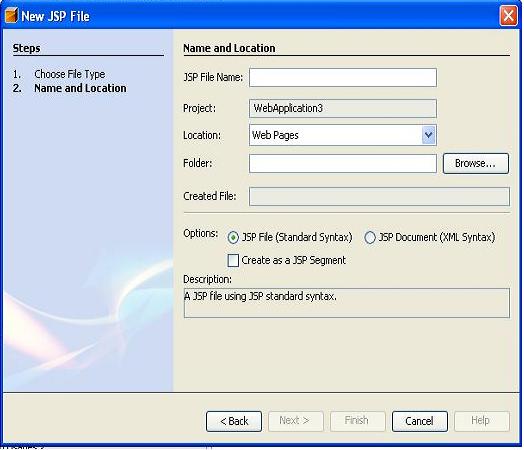
- Following screen will be displayed where file related information can be filled.
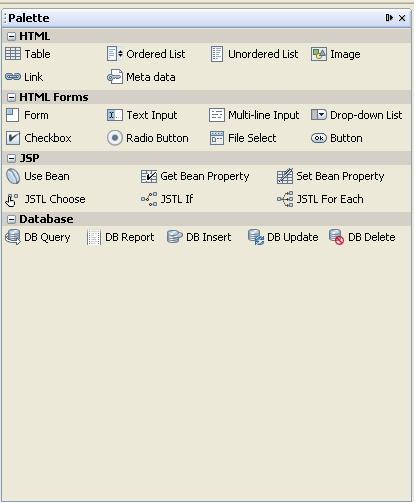
- Fill the information, Click “ Finish ” .JSP page will be created with some default JSP code. A palette viewer will be displayed at right side in IDE, where various options for generating JSP tags can be found.
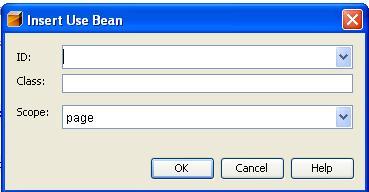
- Here user can click on buttons to generate necessary HTML/JSP code. For Example click on “ Use Bean ” button inside the JSP category then following window will be appeared .Fill the required information.
- Code will be generated in the JSP page .
Related Posts:
- Developement Of Enterprise Applications in NetBeans IDE
- Creating J2ee Modules In NetBeans IDE
- Introduction
- Calling a Message Driven Bean in NetBeans
- Configuring Enterprise Application Servers In NetBeans IDE
- How to set General options in NetBeans IDE
- Generating JavaDoc For a Project In NetBeans IDE
- Calling A Session Bean Using A Web Module
- Toolbar Settings And Shortcuts In NetBeans IDE
- Introduction to Stateful Session Bean In NetBeans


Top Of Page | Trackback
If you found this page useful, consider linking to it. Simply copy and paste the code below into your web site.
It will look like this: How To Edit/Add JSP Pages in NetBeans IDE
